|
http://honeybeegardens.com/
Review of my lovely Honeybee Gardens polishes! Before I get started on my review of these polishes, here's some information about the Honeybee Gardens polishes (from their website www.honeybeegardens.com): -odorless, non-toxic earth-friendly formula -long wearing fabulous colors -Contains NO: FD&C colors, toluene, dibutyl phthalate, xylene, or formaldehyde -25 color options Plain and simple, I love these polishes! And I can tell my lungs love them as well :) Most people don't realize how harmful toluene, dibutyl phthalate, xylene, and formaldehyde are! These are the chemicals that are found in most other polishes; they are damaging to your health, and it's what gives them that awful smell. With the Honeybee Gardens polishes, I can breathe easily while I paint my nails (which is such a relief because I usually wear an annoying face mask to protect my lungs). Before painting my nails, I washed my hands and applied cuticle oil to protect my nails as suggested by Honeybee Gardens. At first, I just did two thin coats of this polish, but I added a third and I'm very pleased with the look. I got a great, opaque light purple color with "Hippie Chick" and a beautiful royal blue with a subtle shine with "Oasis". Looks just like they do in the bottle! My third design was made using 'Serenity'. At first, I tried to use this polish on its own, but even after 4 coats it was still very transparent, and I realized it's perfect for a french! For this look, I painted my tips white, topped with one coat of 'Serenity', and then covered with top coat. I absolutely LOVE the way this polish goes on. Its much easier to work with than the normal, toxic polishes. I would compare the feel of this polish to normal paint, such as acrylic paint. It doesn't dry immediately after application, which makes it much easier to get a perfect application on the nail. It's so smooth and much easier to remove from cuticles if you make a mistake. The polish dried in about 10 minutes, but Honeybee Gardens suggests you keep your nails away from water for about 5 hours for the best, long-lasting results. (The longer you let it set, the longer the polish should last without chipping) It might sound like a long time, but I just painted my nails right before bed and it was not an inconvenience at all! This polish lasted just as long as any other polish in my opinion. I had a few chips after about 4 days, not too bad! Honeybee Gardens have their own special nail polish remover (which, unfortunately, i do not have), so I used regular nail polish remover and it worked just fine. It took a bit longer than usual (about 5 extra minutes). Overall, I love this polish! These polishes are smooth, come in beautiful color options, have NO odor, and are so much better for your health. I recommend to nail painters of any skill level. Hippie Chick - 3 coats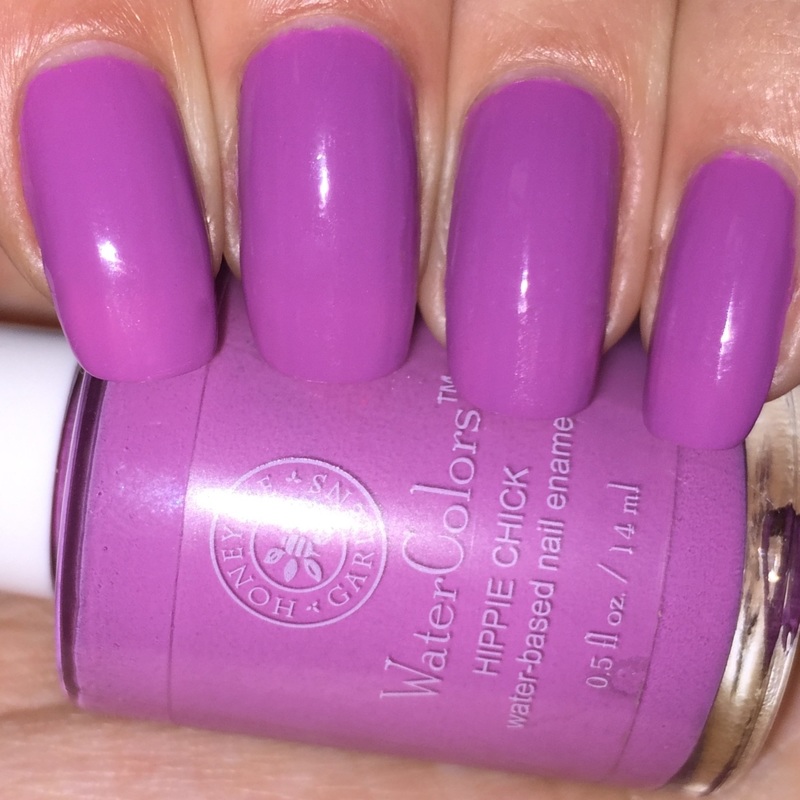
Oasis - 3 coats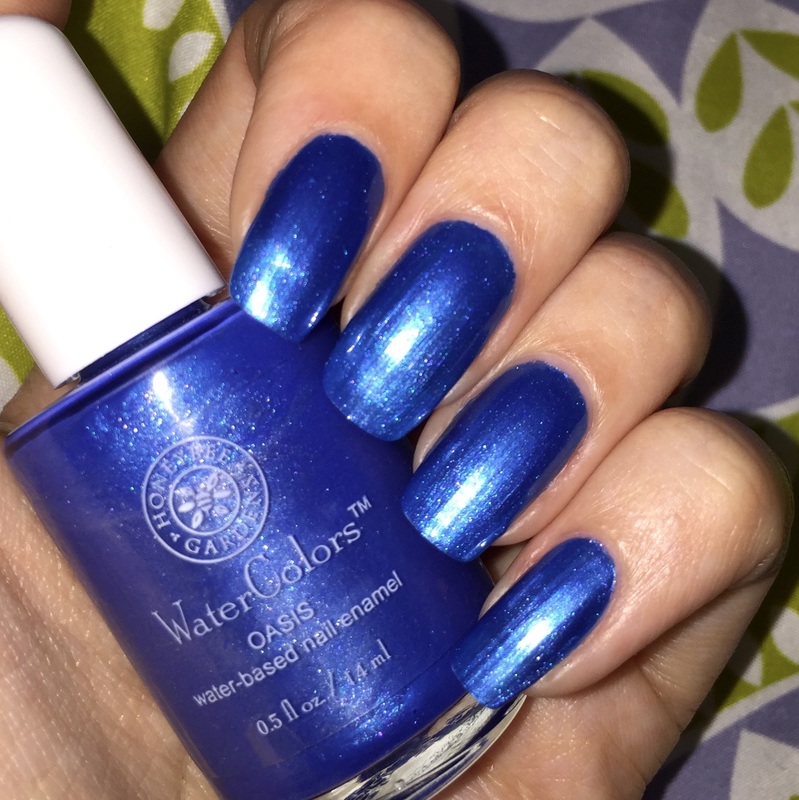
'Serenity' -One coat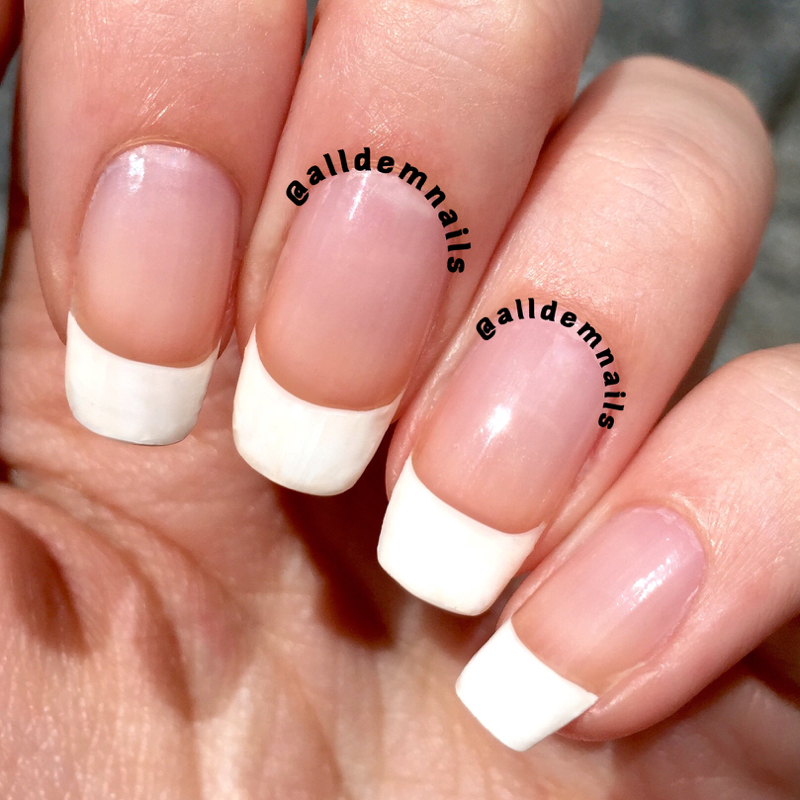
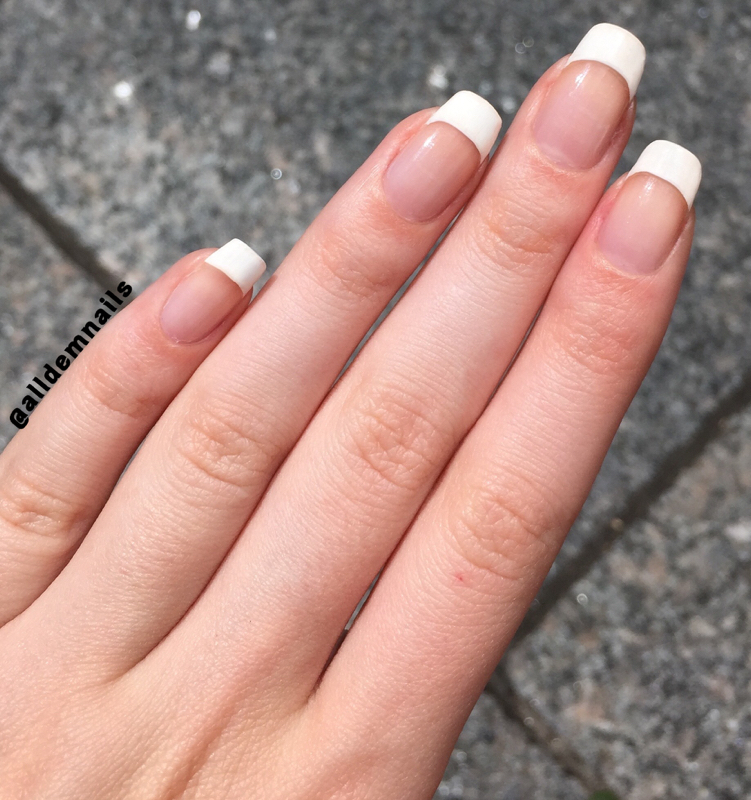
Serenity - Hippie Chick - Oasis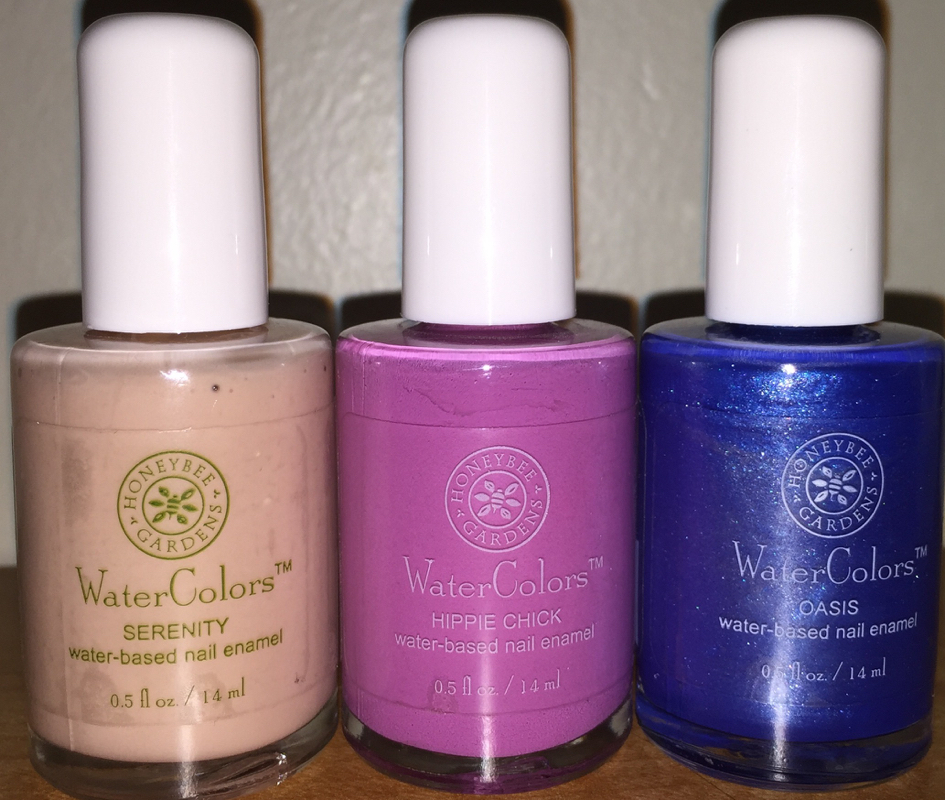
0 Comments
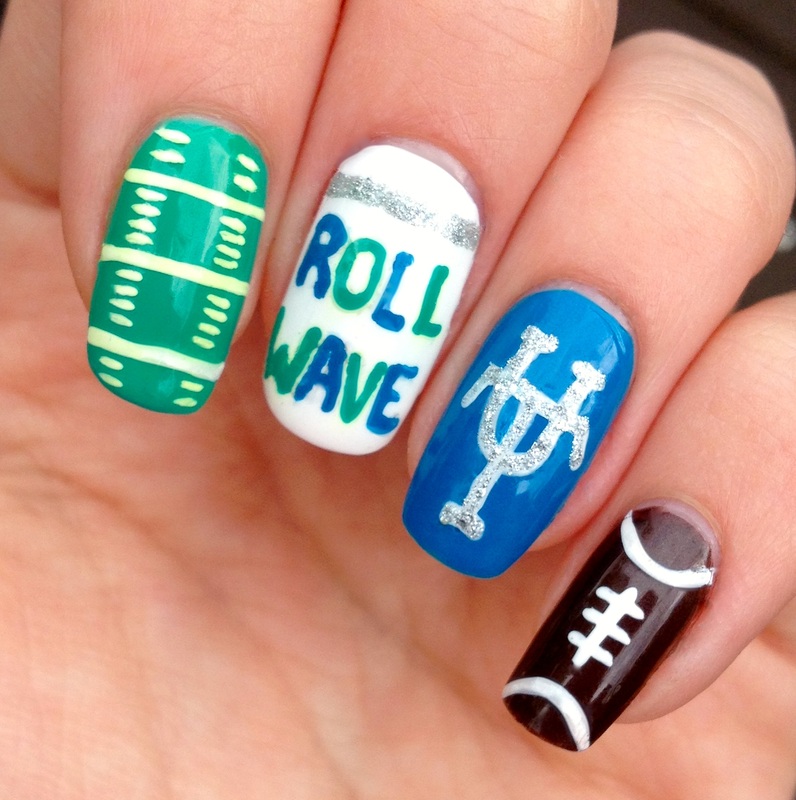
These are a few ideas for fun, school-spirited nails! Roll Wave! 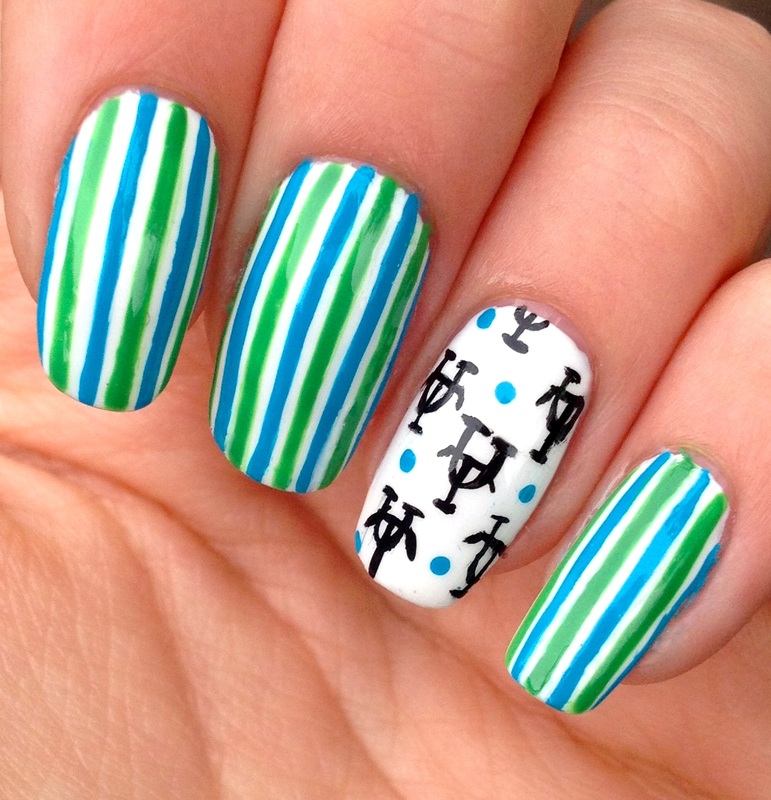
These nails were inspired by Instagram @Banicured_ The polishes used were (left to right): Nina Ultra Pro "Shooting Star", Sinful Colors "Endless Blue", and Salon Perfect "Gone Sailing" 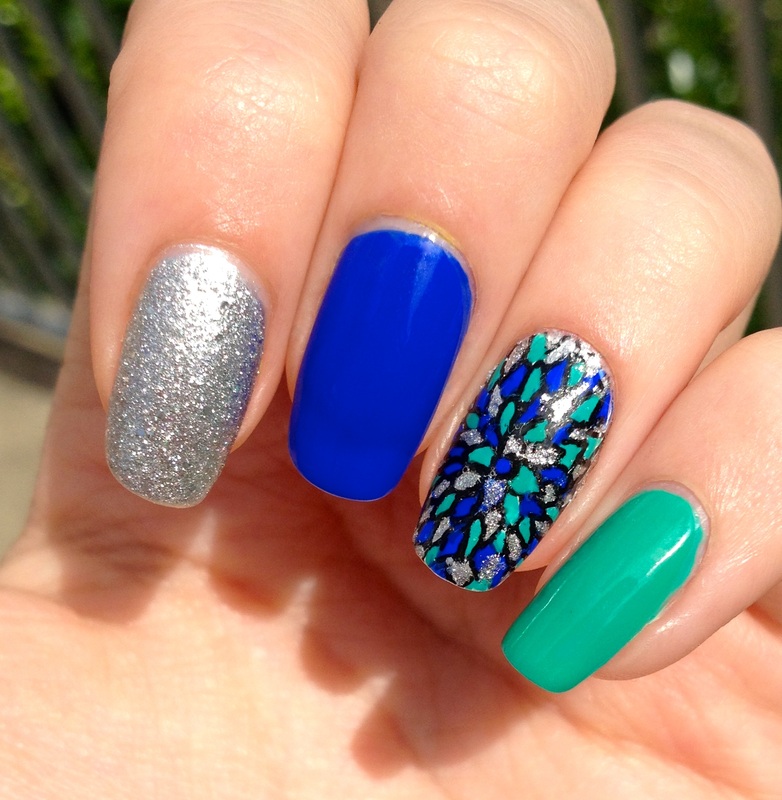
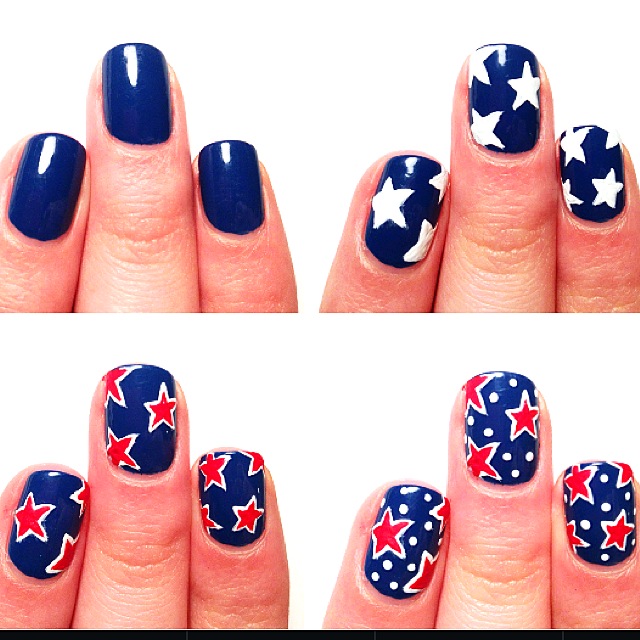
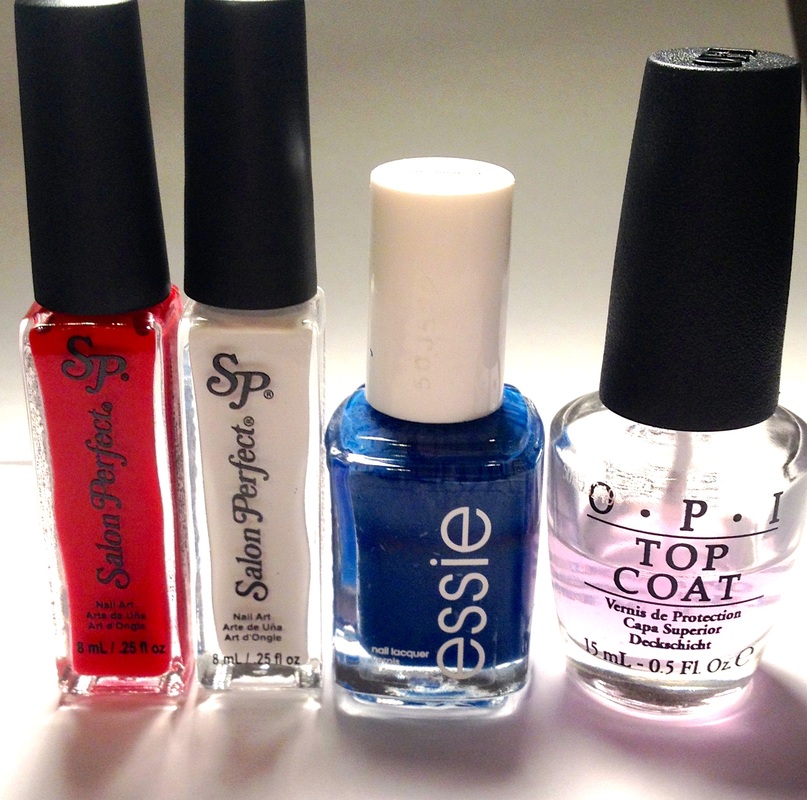
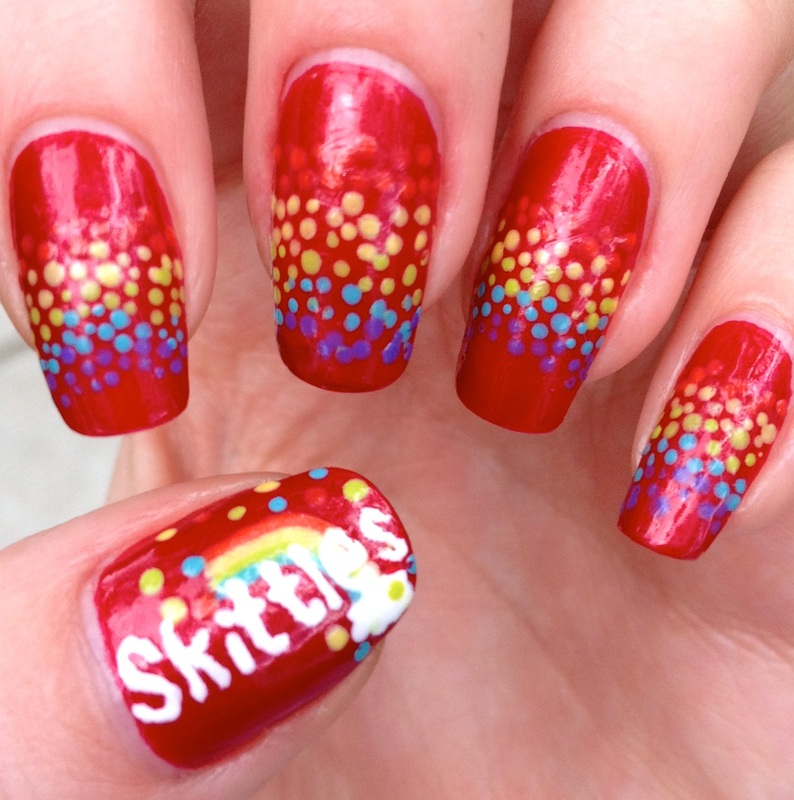
Here is my Fourth of July look! As shown below, polishes used are (from left to right): Salon Perfect "laser beam" and "White out" nail art liners, Essie's Mezmerised, and OPI top coat. OPI is my favorite top coat because I find that it causes the least amount of smudges in my designs. Comment below if you have another favorite brand of top coat! 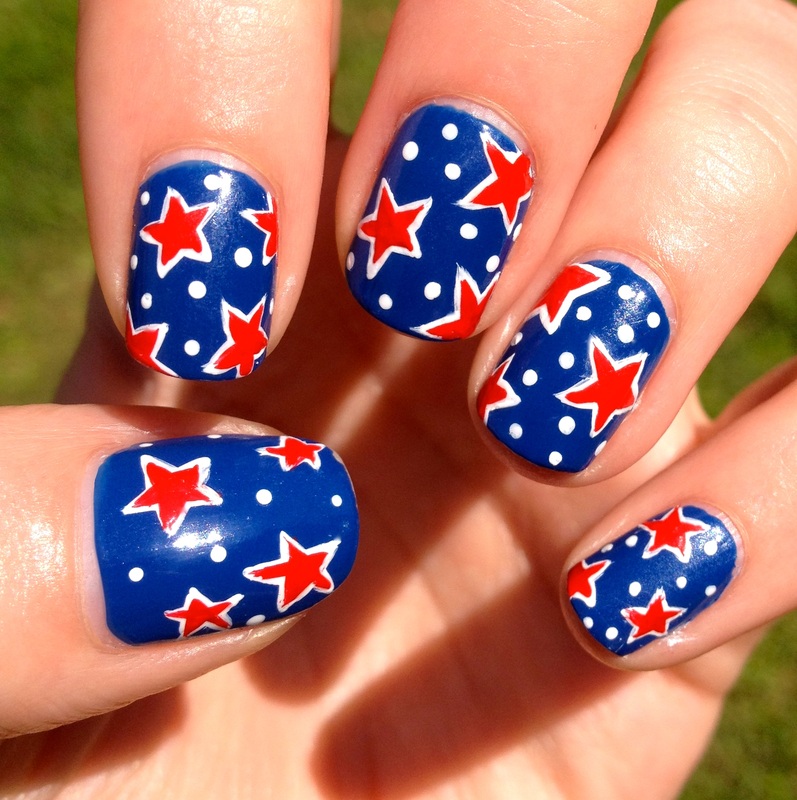
Mean Girls nails are inspired by Instagram user: @Banicured_ 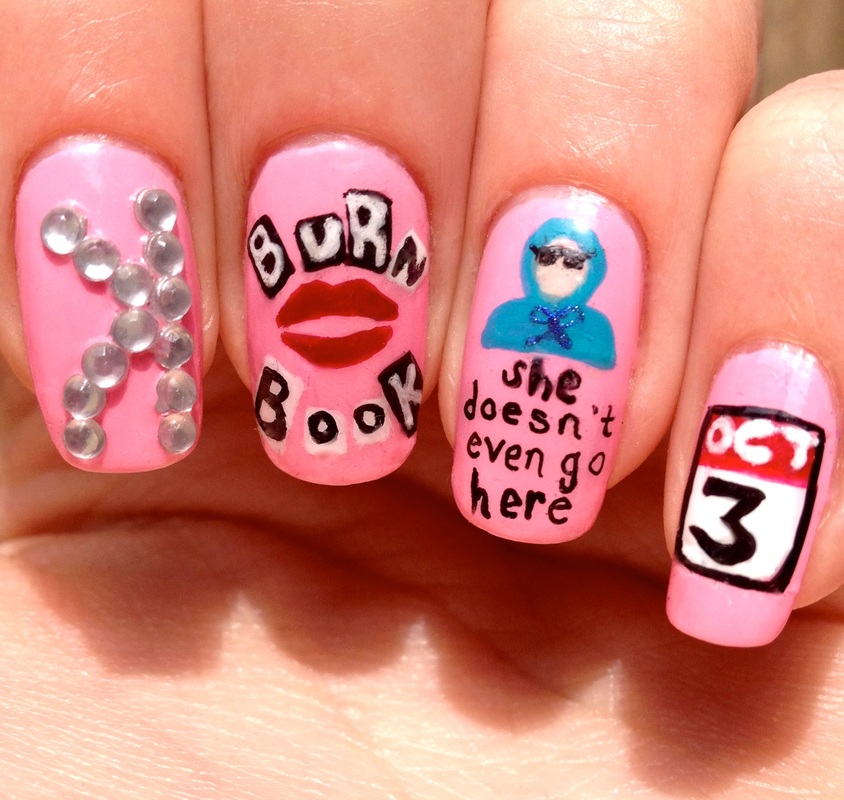
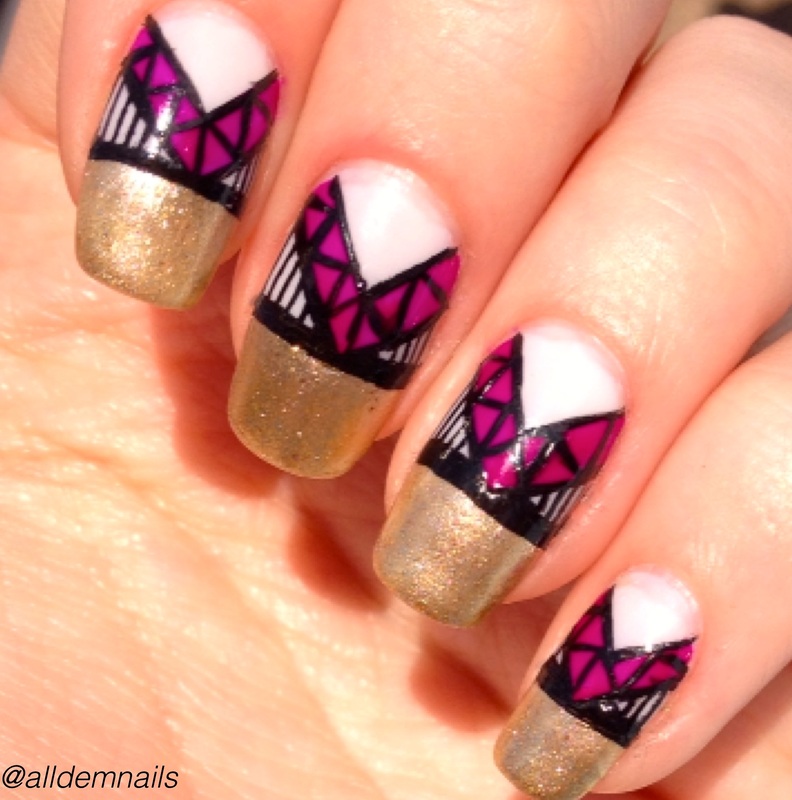
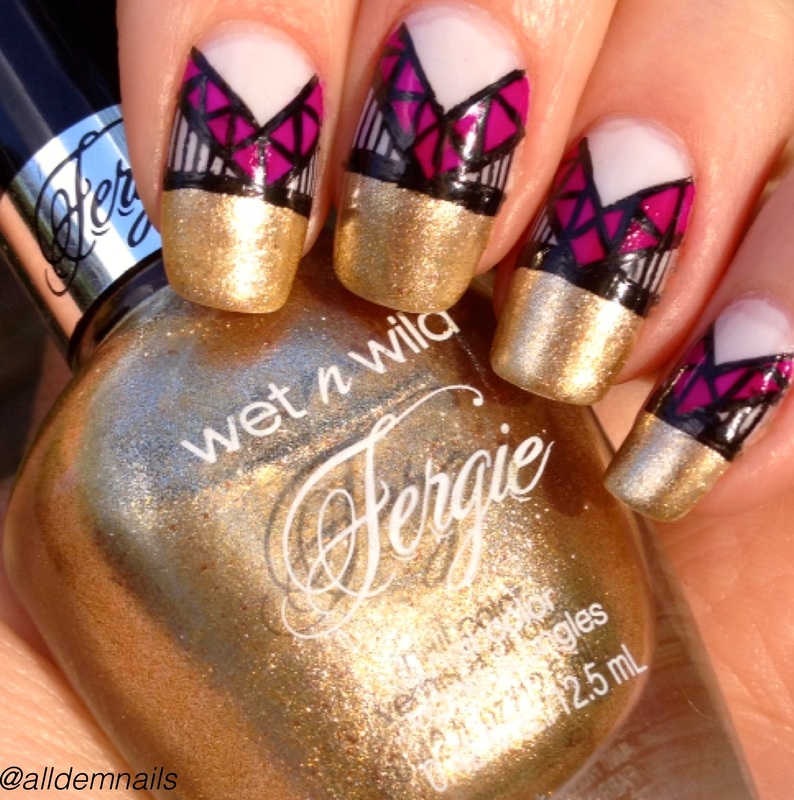
For this design I used Claires polish, Sally Hansen's Fergie Polish, and Salon Perfect black liner for the black detailing. 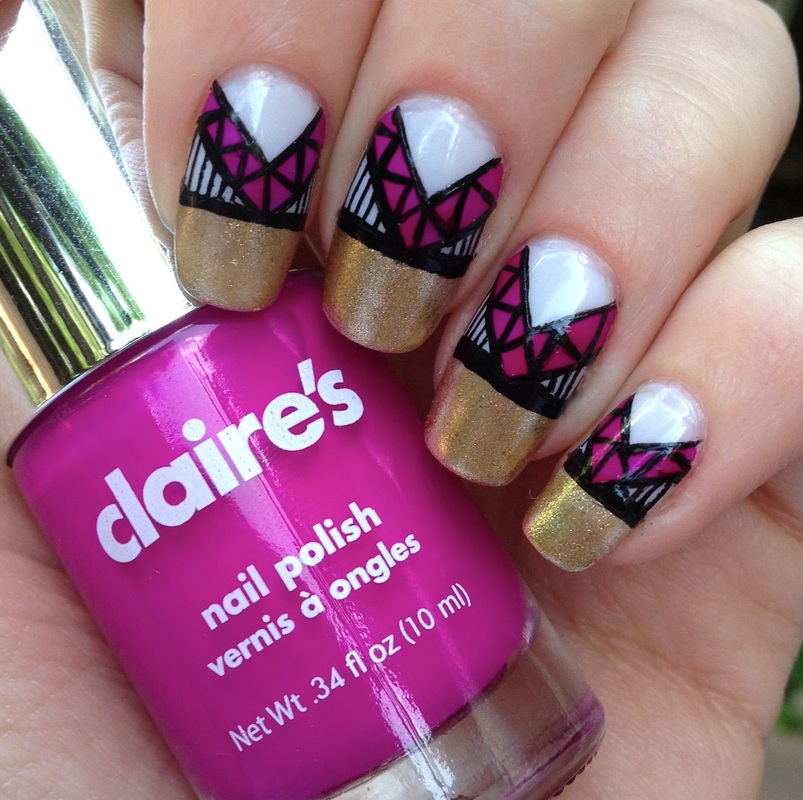
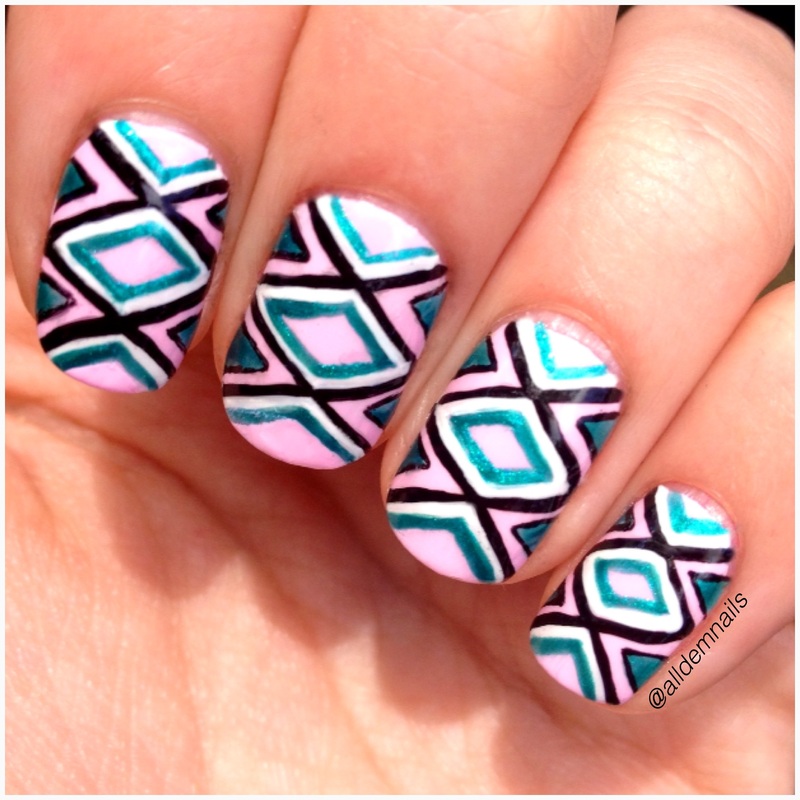
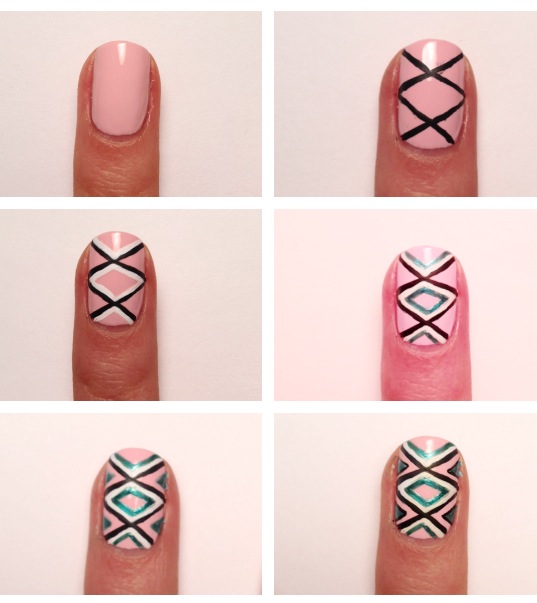
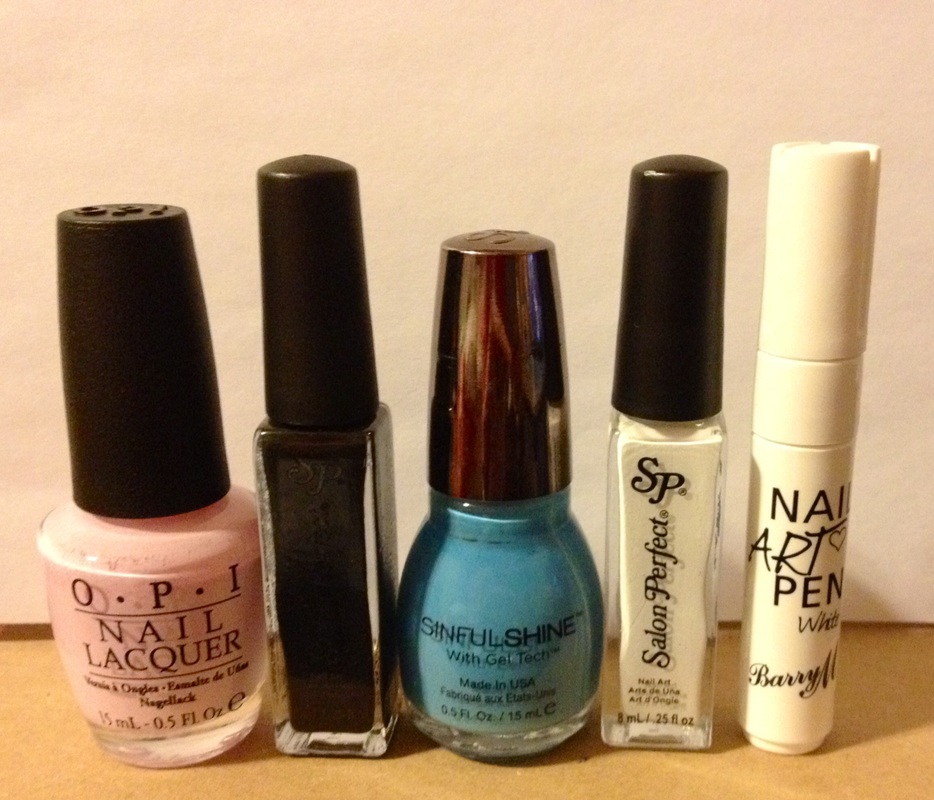
I've creates a criss cross design on my nails using nail tape! It's quite easy to do, here are the steps: 1. Apply base coat 2. Paint your nail desired color (for example, I painted my pointer finger hot pink to begin) 3. Let nails dry for about 10-15 minutes 4. Cut 1 inch long pieces of nail tape 5. Apple nail tape in desired pattern (feel free to be creative here!) 6. Paint desired color over the nail tape (for example, I painted white) 7. Remove tape quickly! Allowing top layer of paint to dry can make it harder to remove the tape, and your design may be a bit messy 8. Apply top coat 9. Repeat steps 1-8 for each nail! Link for nail tape! |
AuthorHello! My name is Lauren, and I find myself painting my nails at every chance I get. I hope to help provide some tips and inspiration to fellow nail art enthusiasts. Enjoy :) Archives
December 2016
Categories
All
|

 RSS Feed
